INSTALLATION & FITMENT
How to remove the front bumper on a BMW F30
A practical, option-aware guide to removing the BMW 3 Series F30 front bumper without damaging clips, wiring or paint.
Required tools
- Torx T25 bit
- Torx T30 bit
- 8 mm socket
- Flexible extension or universal joint
- Plastic trim tool
- Soft blanket or bumper stand
Step-by-step instructions
Before you start
- Park on a level surface, apply the parking brake and switch the ignition off.
- Protect the fenders and place a soft blanket or stand where the bumper can rest.
- Have a helper support the bumper when it is pulled away from the car.
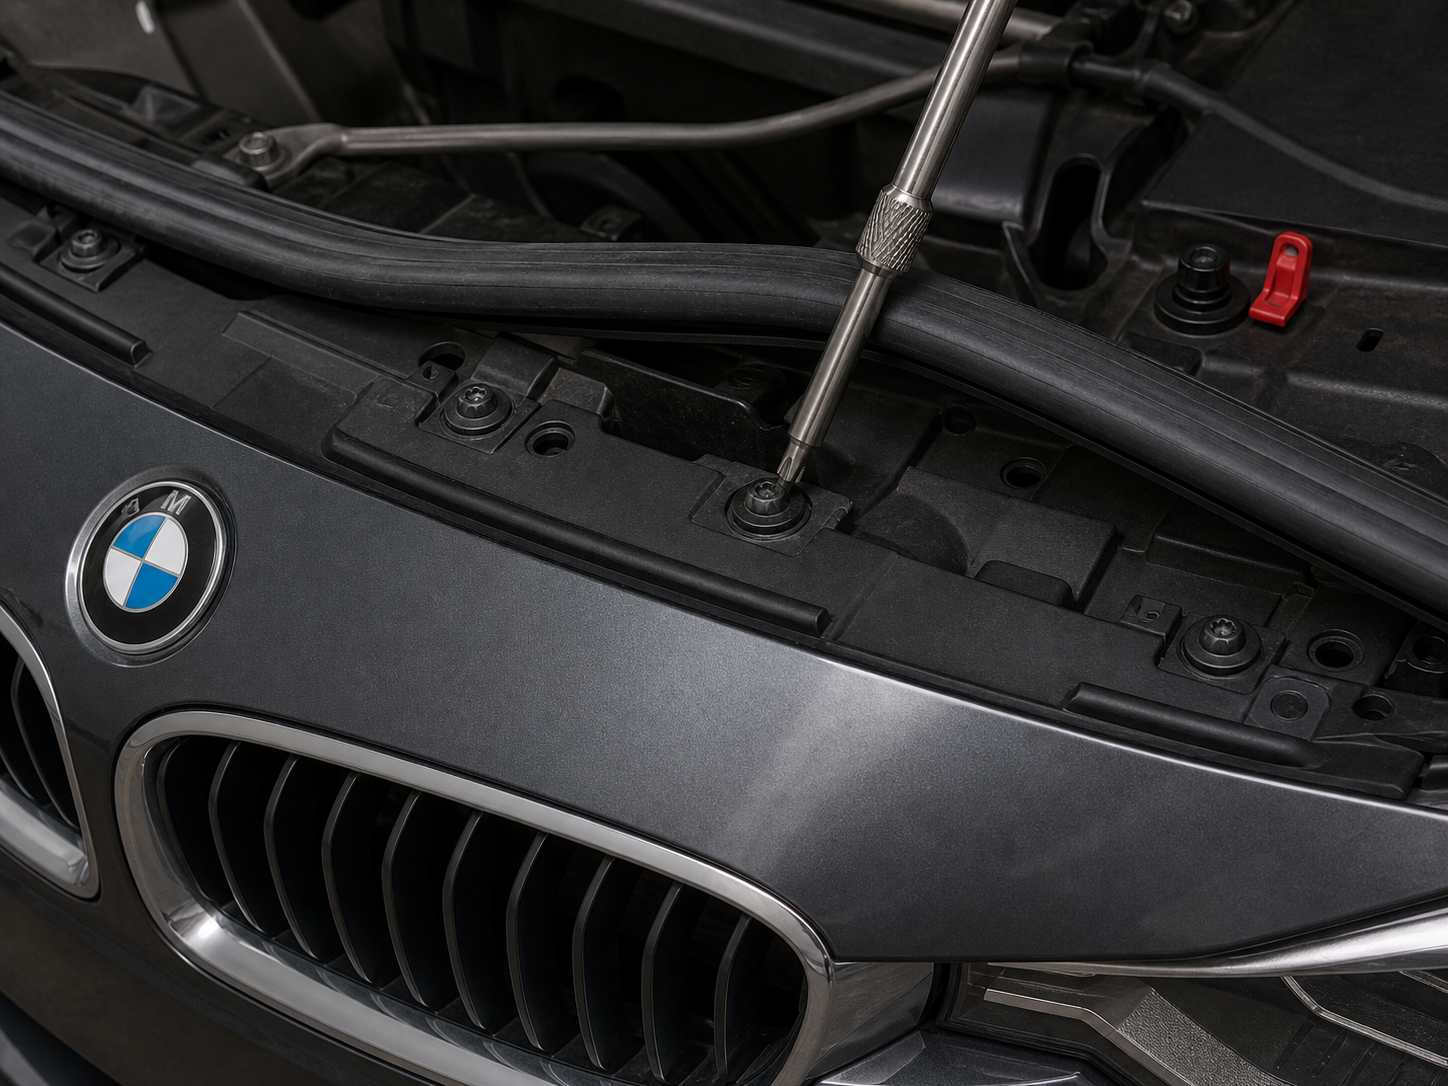
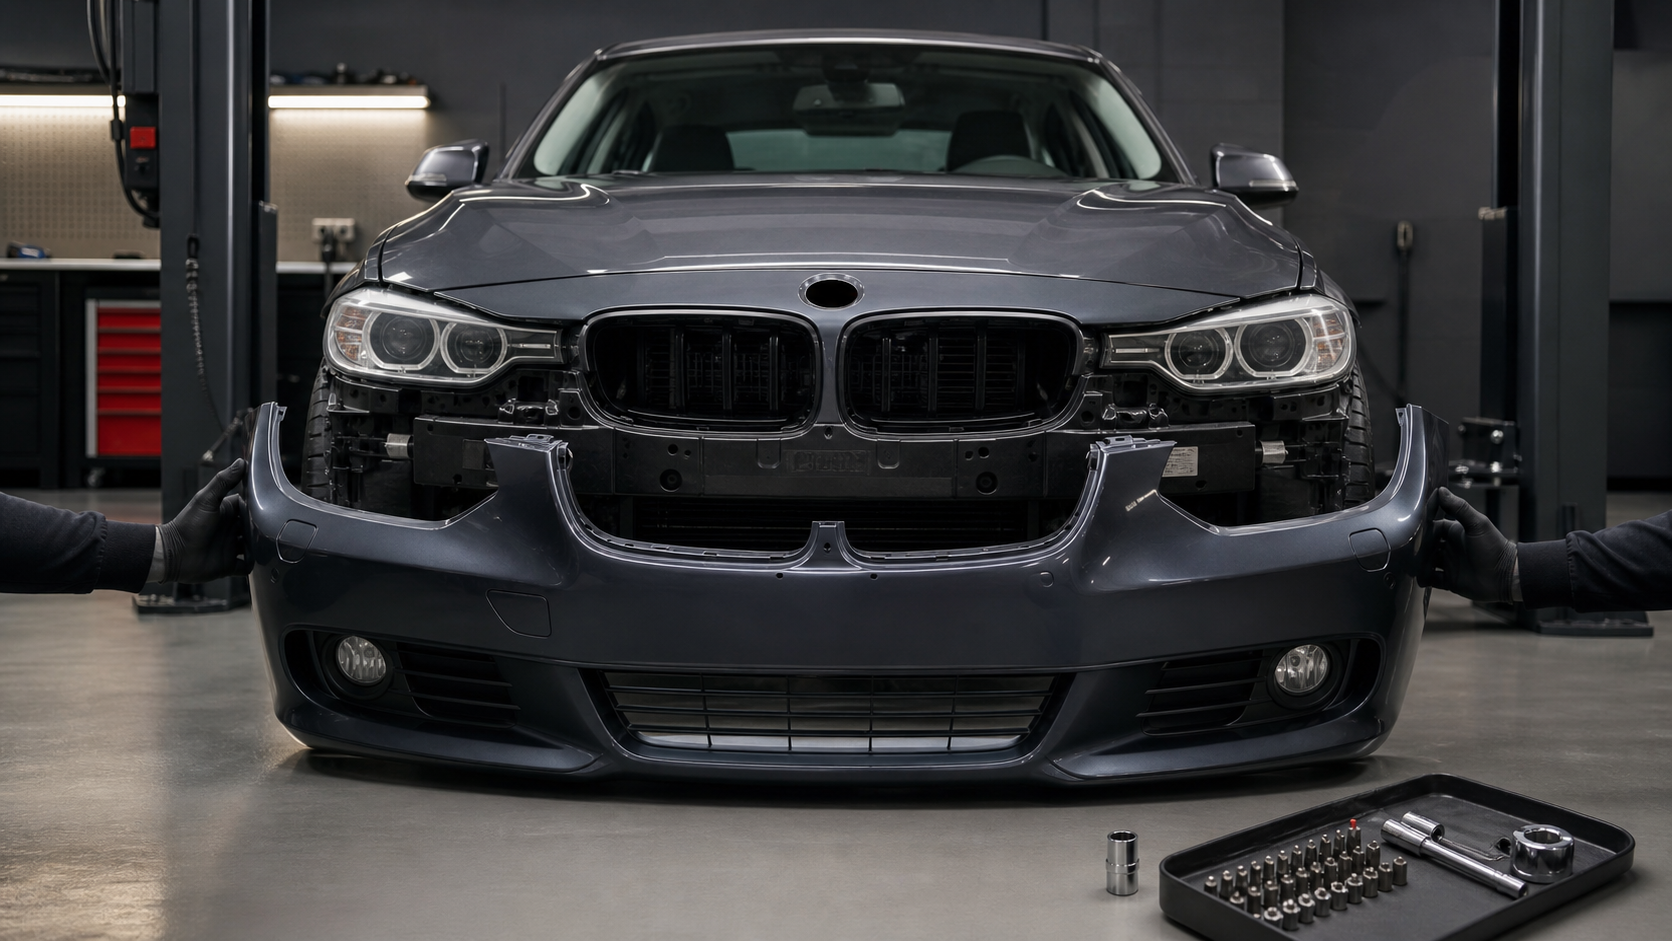
Upper fasteners sit below the rubber weather seal. The generated image is a visual aid; use the fastener positions on your own car as the authority.
1. Gather the tools
You will normally need Torx T25 and T30 bits, an 8 mm socket, and a flexible extension or universal joint for the wheel-arch fasteners. A plastic trim tool and a tray for removed hardware are useful extras.
2. Release the upper fasteners
Lift the rubber seal along the upper edge of the bumper and remove the fasteners underneath it. Leave the outer T25 fasteners near the fenders for later. Keeping those two fasteners in place helps prevent the bumper corners from dropping while the wiring and washer hose are disconnected.
3. Open up the wheel-arch access
Turn the front wheels for access, or remove them if your setup makes the work safer and easier. Loosen the fasteners holding the left and right wheel-arch liners to the bumper. Move the liner aside rather than forcing it; some cars also use a push-in rivet or trim clip at the bumper edge.
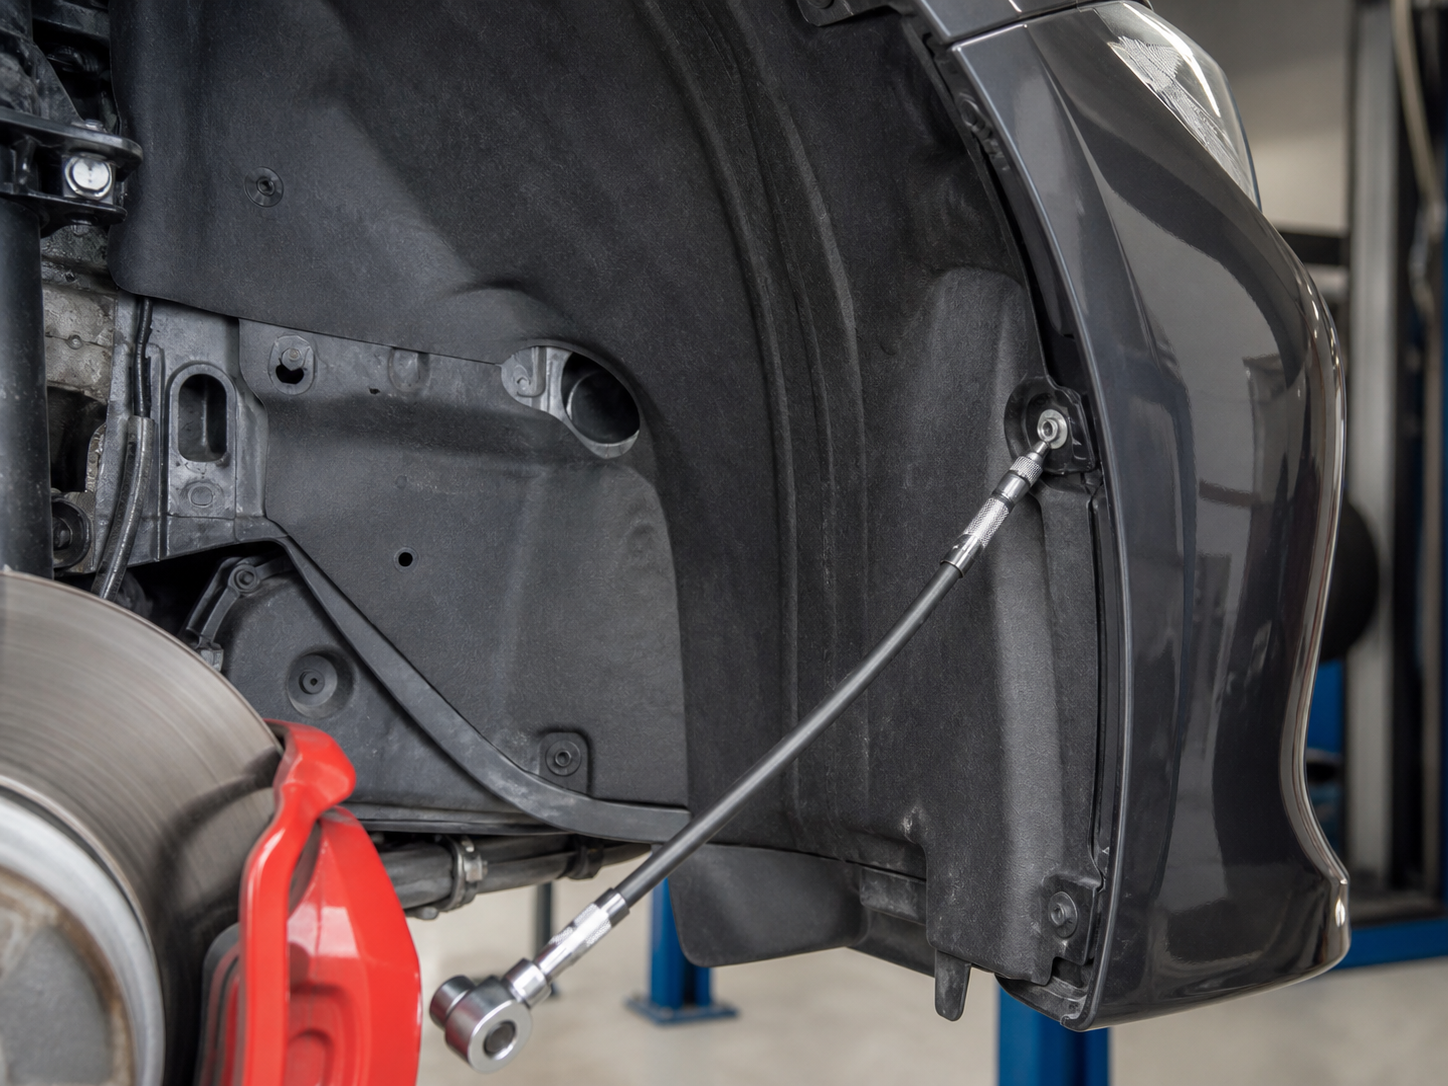
The flexible extension makes the side fasteners easier to reach without twisting the liner.
4. Remove the side fasteners
Use the 8 mm socket to remove the bumper fasteners on both sides. Work evenly from left to right and keep each side's hardware together. Do not pull the bumper forward yet: first check that the fog-lamp connectors, parking-sensor wiring and headlamp-washer hose are free to be disconnected on your configuration.
5. Disconnect the options and release the clips
With a helper supporting the lower edge, pull the bumper straight forward a small amount. The side retainers should slide out of the fender guides. Stop as soon as a cable or hose becomes taut, disconnect it without pulling on the wire, and cap or secure any washer hose so it cannot drain into the work area.
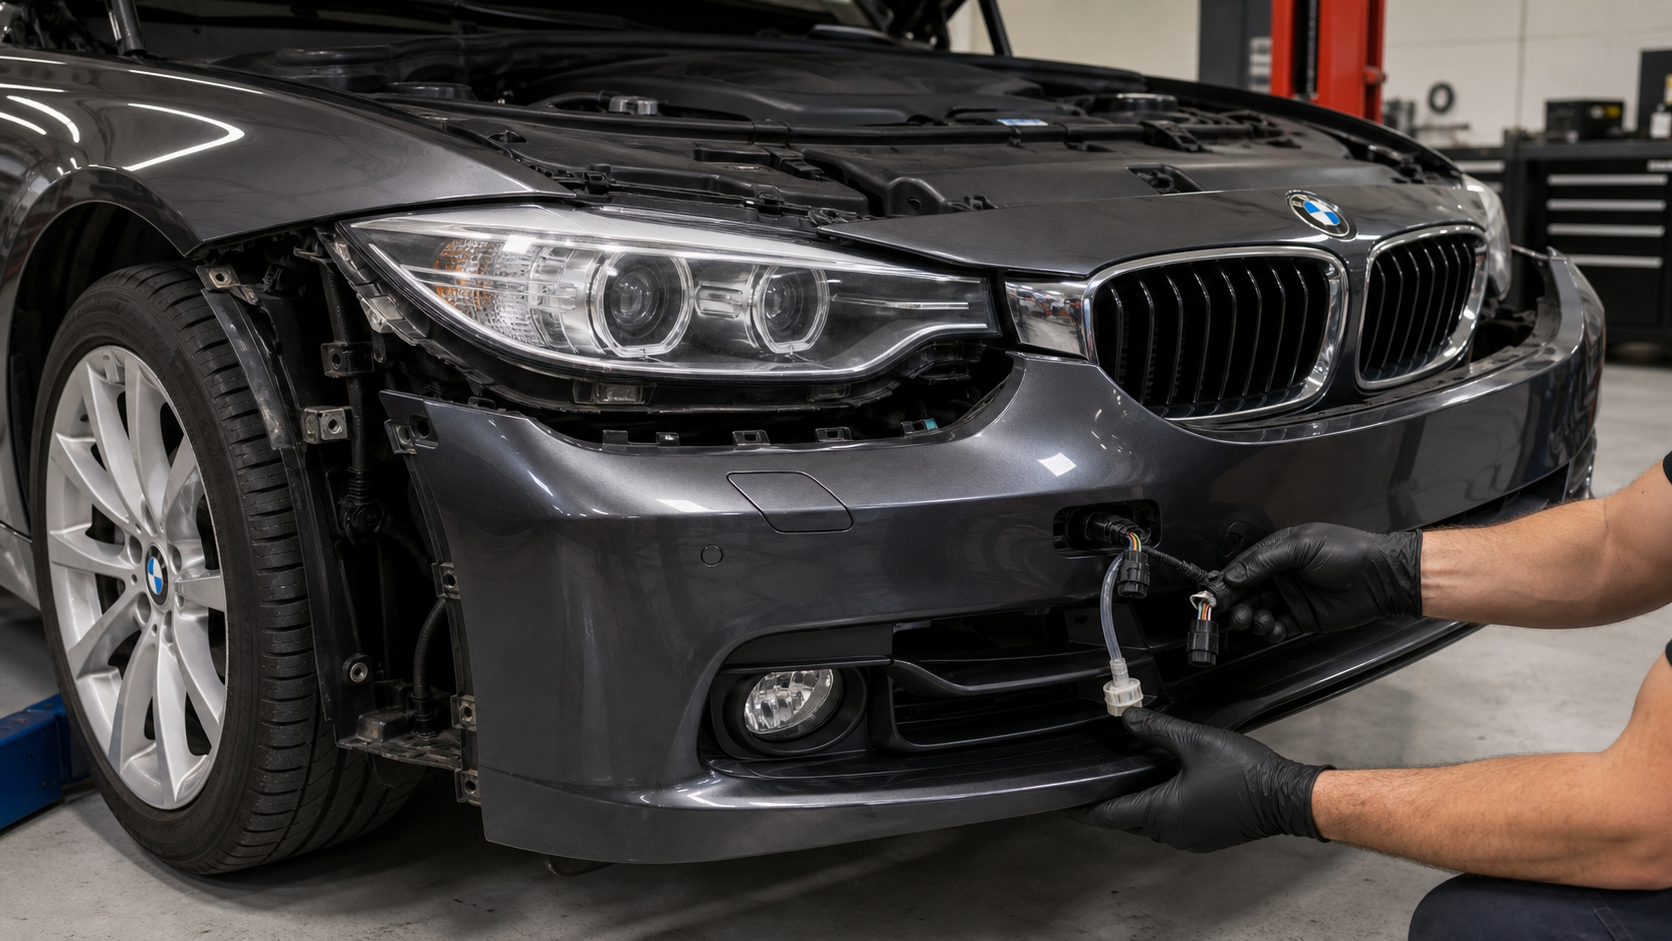
Support the bumper close to the car while releasing clips and disconnecting equipment.
6. Remove the bumper
Once the options are disconnected, remove the remaining T25 fasteners at the upper corners and lift the bumper away with the helper. Put it face-up on a soft surface. Before refitting, inspect the guides, clips, wiring plugs, washer hose and all fasteners for damage or missing hardware.
Refitting checklist
- Reconnect every plug and washer hose before the bumper is fully seated.
- Engage both fender guides evenly; never use a screw to pull a misaligned corner into place.
- Reinstall the side, upper and wheel-arch fasteners in the reverse order.
- Check panel gaps, fog lamps, parking sensors and the headlamp-washer system before driving.
This guide is a localized, original rewrite, not a factory repair manual. Fastener count, clips and equipment vary between F30 body styles, LCI versions and option packages.